Learning Goals of this guide
- Brief introduction to containers, Kubernetes, Streamlit, and Polyaxon.
- Create a Kubernetes cluster and deploy Polyaxon with Helm.
- How to explore datasets on a Jupyter Notebook running on a Kubernetes cluster.
- How to train multiple versions of a machine learning model using Polyaxon on Kubernetes.
- How to save a machine learning model.
- How to analyze the models using Polyaxon UI.
- How to expose the model with a user interface using Streamlit and make new predictions.
Tools Required for this guide
What is a container?
A container is a standard unit of software that packages up code and all its dependencies so the application runs quickly and reliably from one computing environment to another. Docker is a tool designed to make it easier to create, deploy, and run applications by using containers. In our guide we will use containers to package our code and dependencies and easily deploy them on Kubernetes.
What is Kubernetes?
Kubernetes is a powerful open-source distributed system for managing containerized applications. In simple words, Kubernetes is a system for running and orchestrating containerized applications across a cluster of machines. It is a platform designed to completely manage the life cycle of containerized applications.
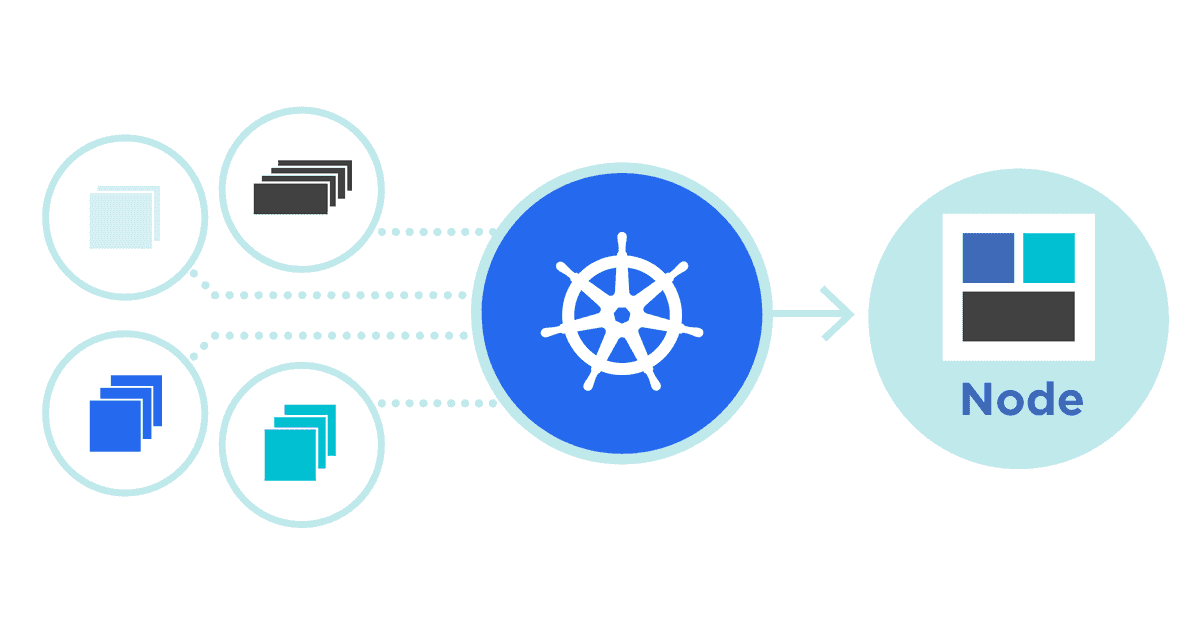
Why should I use Kubernetes.
- Load Balancing: Automatically distributes the load between containers.
- Scaling: Automatically scale up or down by adding or removing containers when demand changes such as peak hours, weekends and holidays.
- Storage: Keeps storage consistent with multiple instances of an application.
- Self-healing Automatically restarts containers that fail and kills containers that don’t respond to your user-defined health check.
- Automated Rollouts you can automate Kubernetes to create new containers for your deployment, remove existing containers and adopt all of their resources to the new container.
What is Streamlit?
Streamlit is an open-source framework to create an interactive, beautiful visualization app. All in python! Streamlit provides many useful features that can be very helpful in making visualizations for data-driven projects.
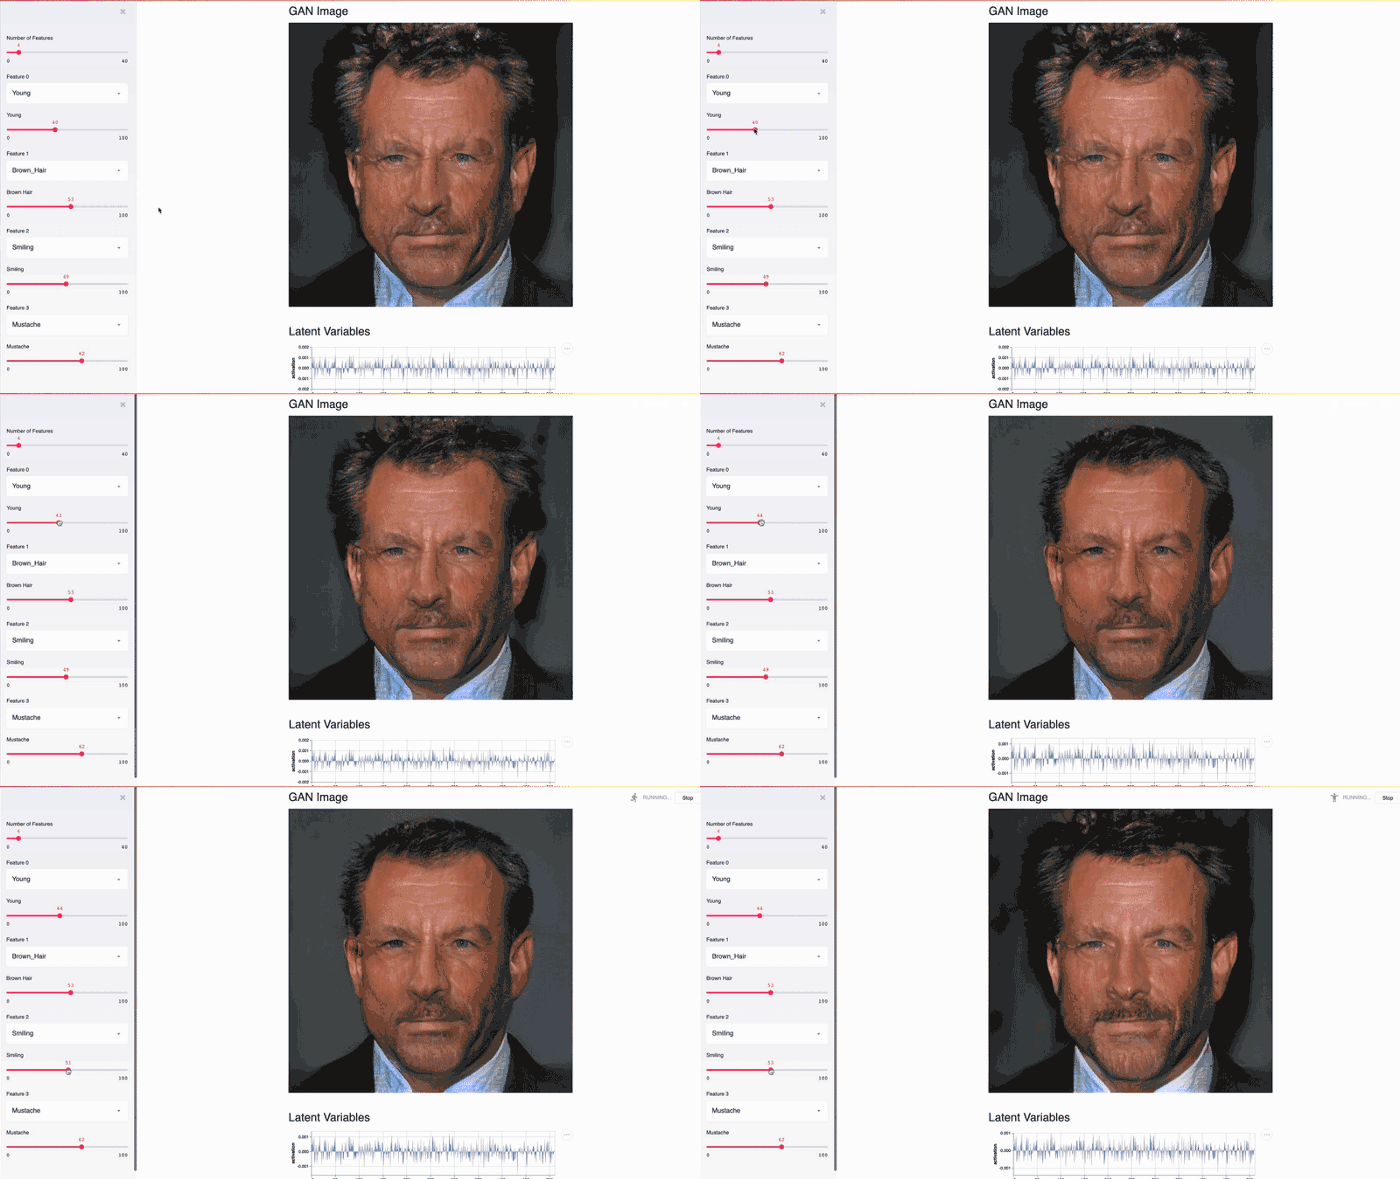 This Streamlit app demonstrates NVIDIA celebrity face GAN model using Shaobo Guan’s TL-GAN.
Why should I use Streamlit?
- Simple and easy way to create an interactive user interface.
- Requires zero development experience.
- Simple documentation.
What is Polyaxon?
Polyaxon is an open-source cloud native machine learning platform, that provides simple interfaces to train, monitor, and manage models. Polyaxon runs on top of Kubernetes to allow scaling up and down of your cluster’s resources, and provides tools to automate the process of experimentation, while tracking information about models, configurations, parameters, and code.

Why should I use Polyaxon?
- Automatically track key model metrics, hyperparameters, visualizations, artifacts and resources, and version control code and data.
- Maximize the usage of your cluster by scheduling jobs and experiments via the CLI, dashboard, SDKs, or REST API.
- Use optimization algorithms to effectively run parallel experiments and find the best model.
- Visualize, search, and compare experiment results, hyperparams, training data and source code versions, so you can quickly analyze what worked and what didn’t.
- Consistently develop, validate, deliver, and monitor models to create a competitive advantage.
- Scale your resources as needed, and run jobs and experiments on any platform (AWS, Microsoft Azure, Google Cloud Platform, and on-premises hardware).
What is Helm?

Helm is the package manager for Kubernetes, it allows us to deploy and manage the life cycle of cloud native projects like Polyaxon.
Setting the workspace
The purpose of this tutorial is to get hands-on experience of running machine learning experimentation and deployment on Kubernetes. Let’s get started by creating our workspace.
Step 1 - Install Helm
Install Helm on your local machine to be able to manage Polyaxon as well as other cloud native projects that you might want to run on Kubernetes.
curl -fsSL -o get_helm.sh https://raw.githubusercontent.com/helm/helm/master/scripts/get-helm-3
chmod 700 get_helm.sh
./get_helm.sh
Step 2 - Add Polyaxon Charts to Helm
helm repo add polyaxon https://charts.polyaxon.comStep 3 - Install Polyaxon CLI
pip install -U polyaxonStep 4 - Deploy Polyaxon to Kubernetes
polyaxon admin deployStep 5 - Wait for the deployments to reach the ready state
kubectl get deployment -n polyaxon -wThis should take about 3 min:
NAME                         READY   UP-TO-DATE   AVAILABLE   AGE
polyaxon-polyaxon-api        1/1     1            1           3m17s
polyaxon-polyaxon-gateway    1/1     1            1           3m17s
polyaxon-polyaxon-operator   1/1     1            1           3m17s
polyaxon-polyaxon-streams    1/1     1            1           3m17s
Step 6 - Expose Polyaxon API and UI
Polyaxon provides a simple command to expose the dashboard and the API in a secure way on your localhost:
polyaxon port-forwardStep 7 - Create a project on Polyaxon
In a different terminal session than the one used for exposing the dashboard, run:
polyaxon project create --name=streamlit-appYou should see:
Project `streamlit-app` was created successfully.
You can view this project on Polyaxon UI: http://localhost:8000/ui/root/streamlit-app/
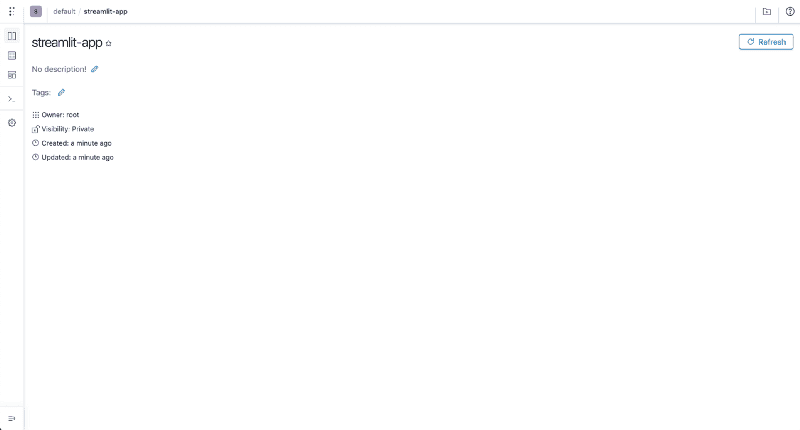
Now we can move to the next section: training and analyzing a model.
Training a machine learning model
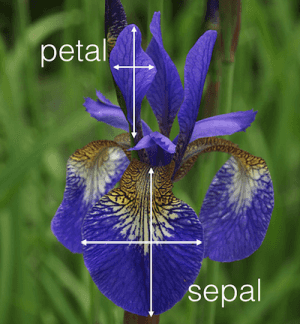
In this tutorial we will train a model to classify Iris flower species from its features.
Iris features: Sepal, Petal, lengths, and widths
Exploring the datasets
We will start first by exploring the iris dataset in a notebook session running on our Kubernetes cluster.
Let’s start a new notebook session and wait until it reaches the running state:
polyaxon run --hub jupyter-lab -wPolyaxon provides a list of highly productive components, called hub, and allows to start a notebook session using a single command. behind the scene Polyaxon will create a Kubernetes deployment and a headless service, and will expose the service using Polyaxon’s API. For more details please check Polyaxon’s open-source hub.
After a couple of seconds the notebook will be running.
Note: if you stopped the previous command, you can always get the last (cached) running operation by executing the command:
polyaxon ops service
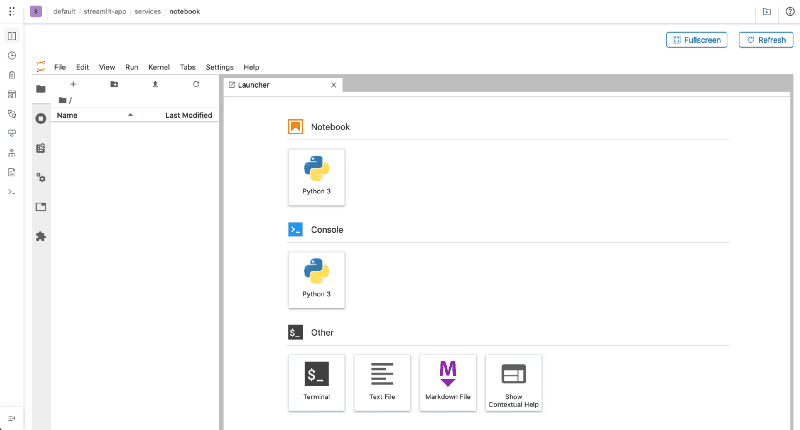
Let’s create a new notebook and start by examining the dataset’s features:
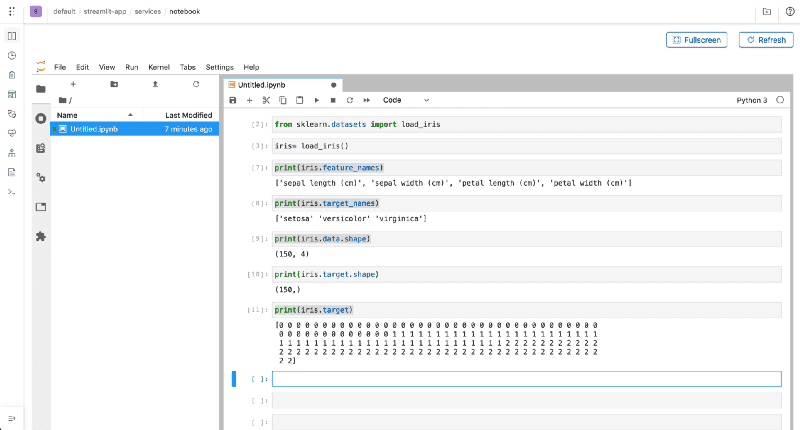
Commands executed:
from sklearn.datasets import load_iris

iris= load_iris()

print(iris.feature_names)
print(iris.target_names)
print(iris.data.shape)
print(iris.target.shape)
print(iris.target)
The dataset is about the Iris flower species:

Exploring the model
There are different classes of algorithms that scikit-learn offers, in the scope of this tutorial, we will use Nearest Neighbors algorithm.
Before we create a robust script, we will play around with a simple model in our notebook session:
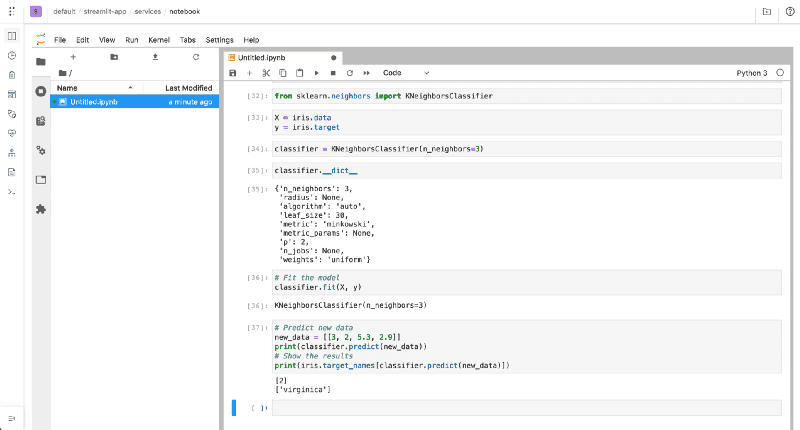
Commands executed:
from sklearn.neighbors import KNeighborsClassifier

X = iris.data
y = iris.target

classifier = KNeighborsClassifier(n_neighbors=3)
# Fit the model
classifier.fit(X, y)

# Predict new data
new_data = [[3, 2, 5.3, 2.9]]
print(classifier.predict(new_data))

# Show the results
print(iris.target_names[classifier.predict(new_data)])
In this case we used n_neighbors=3 and the complete dataset for training the model.
In order to explore different variants of our model, we need to make a script for our model, and parametrize the inputs and outputs, to easily change the parameters such as n_neighbors we also need to establish some rigorous way of estimating the performance of the model.
A practical way of doing that, is by creating an evaluation procedure where we would split the dataset to training and testing. We train the model on the training set and evaluate it on the testing set.
scikit-learn provides methods to split a dataset:
from sklearn.model_selection import train_test_split

X_train, X_test, y_train, y_test = train_test_split(X, y, test_size=0.3, random_state=1012)
Productionizing the model training
Now that we established some practices let’s create a function that accepts parameters, trains the model, and saves the resulting score:
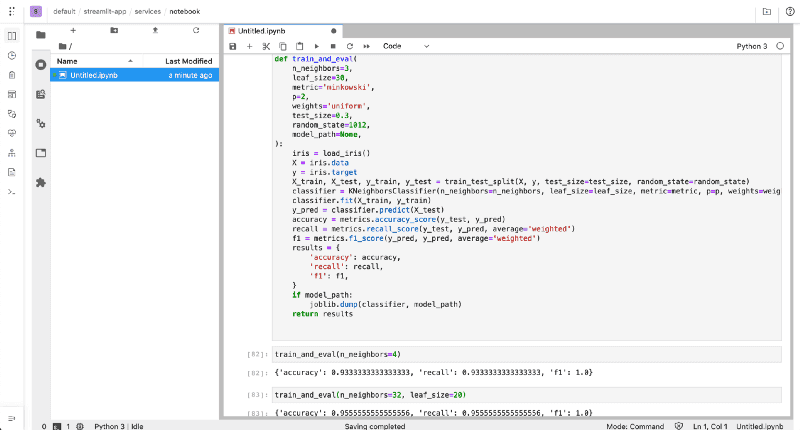
Commands executed:
from sklearn.model_selection import train_test_split
from sklearn.neighbors import KNeighborsClassifier
from sklearn import metrics
from sklearn.datasets import load_iris
try:
    from sklearn.externals import joblib
except:
    pass

def train_and_eval(
    n_neighbors=3,
    leaf_size=30,
    metric='minkowski',
    p=2,
    weights='uniform',
    test_size=0.3,
    random_state=1012,
    model_path=None,
):
    iris = load_iris()
    X = iris.data
    y = iris.target
    X_train, X_test, y_train, y_test = train_test_split(X, y, test_size=test_size, random_state=random_state)
    classifier = KNeighborsClassifier(n_neighbors=n_neighbors, leaf_size=leaf_size, metric=metric, p=p, weights=weights)
    classifier.fit(X_train, y_train)
    y_pred = classifier.predict(X_test)
    accuracy = metrics.accuracy_score(y_test, y_pred)
    recall = metrics.recall_score(y_test, y_pred, average='weighted')
    f1 = metrics.f1_score(y_pred, y_pred, average='weighted')
    results = {
        'accuracy': accuracy,
        'recall': recall,
        'f1': f1,
    }
    if model_path:
        joblib.dump(classifier, model_path)
    return results
Now we have a script that accepts parameters to evaluate the model based on different inputs, saves the model and returns the results, but this is still very manual, and for larger and more complex models this is very impractical.
Running experiments with Polyaxon
Instead of running the model by manually changing the values in the notebook, we will create a script and run the model using Polyaxon. We will also log the resulting metrics and model using Polyaxon’s tracking module. The code for the model that we will train can be found in this github repo.
Running the example with the default parameters:
polyaxon run --url=https://raw.githubusercontent.com/polyaxon/polyaxon-examples/master/in_cluster/sklearn/iris/polyaxonfile.yml -lRunning with a different parameters:
polyaxon run --url=https://raw.githubusercontent.com/polyaxon/polyaxon-examples/master/in_cluster/sklearn/iris/polyaxonfile.yml -l -P n_neighbors=50Scheduling multiple parallel experiments
Instead of manually changing the parameters, we will automate this process by exploring a space of configurations:
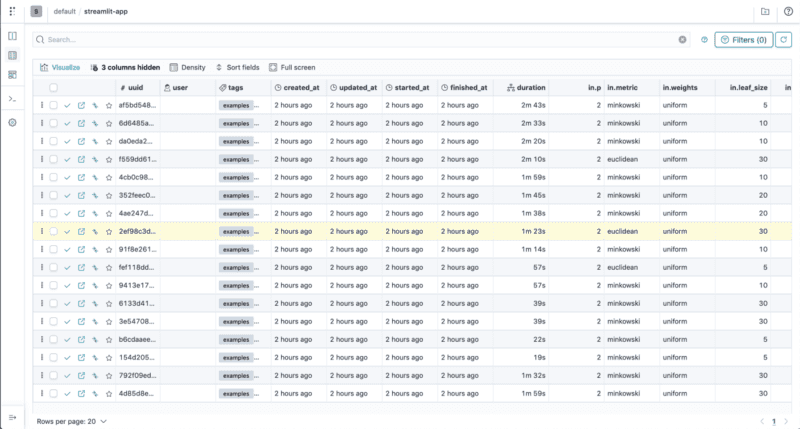
polyaxon run --url=https://raw.githubusercontent.com/polyaxon/polyaxon-examples/master/in_cluster/sklearn/iris/hyper-polyaxonfile.yml --eagerYou will see the CLI creating several experiments that will run in parallel:
Starting eager mode...
Creating 15 operations
A new run `b6cdaaee8ce74e25bc057e23196b24e6` was created
...
Analyzing the experiments
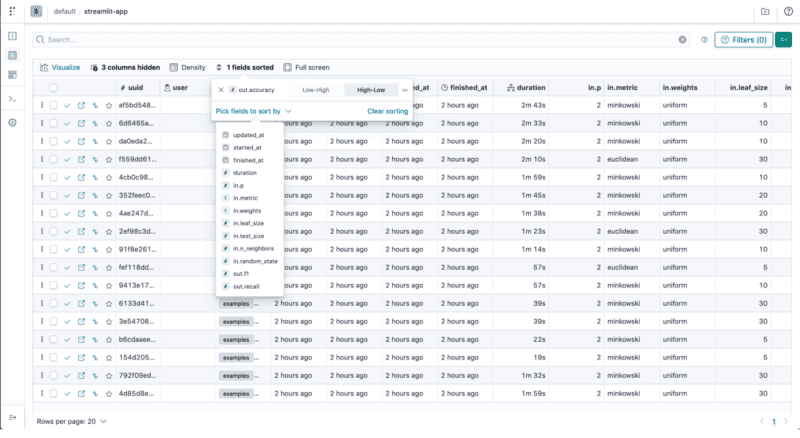
Sorting the experiments based on their accuracy metric
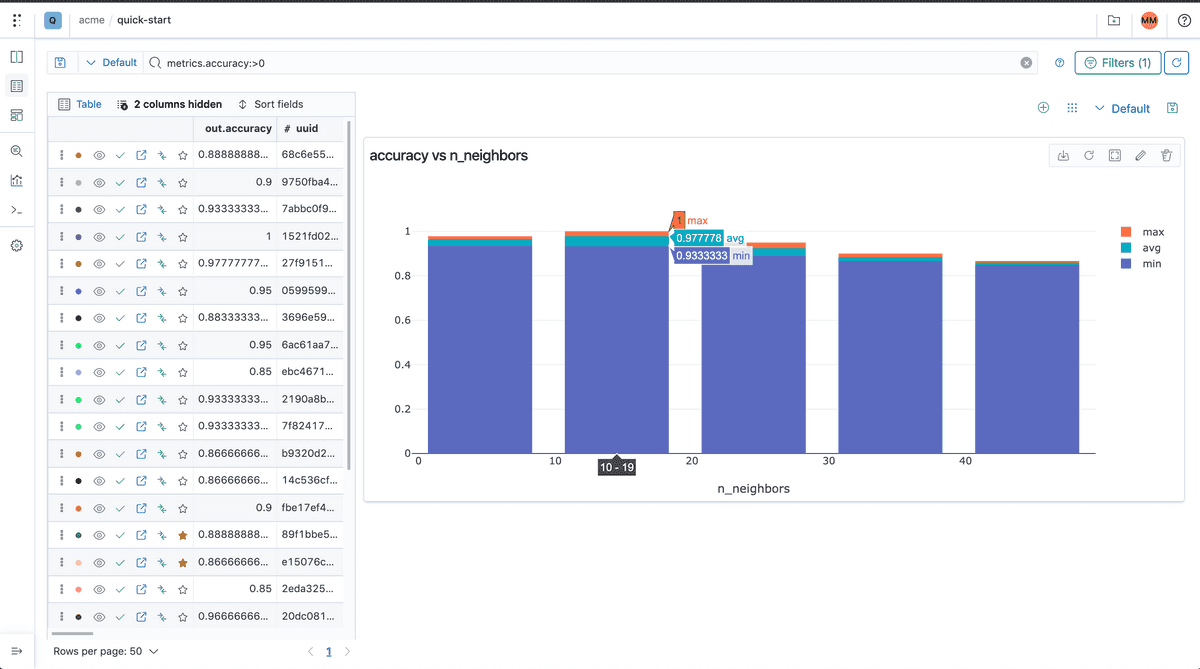
Comparing accuracy against n_neighbors
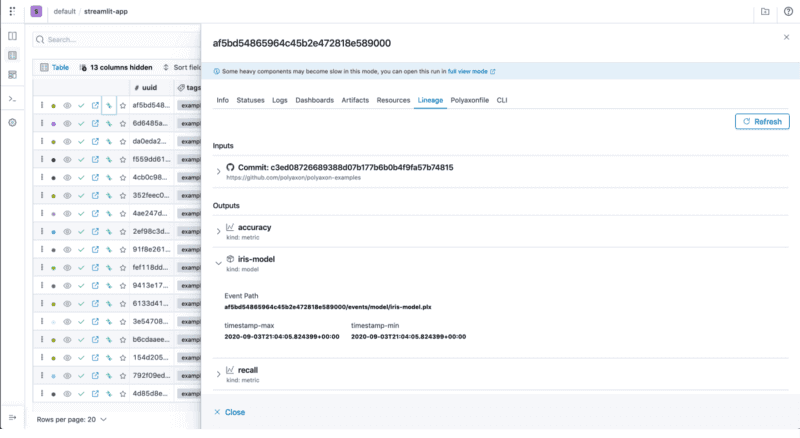
Selecting the best model by accuracy
In our script we used Polyaxon to log a model every time we run an experiment:
# Logging the model
tracking.log_model(model_path, name="iris-model", framework="scikit-learn")
Deploying the model as an Iris Classification App
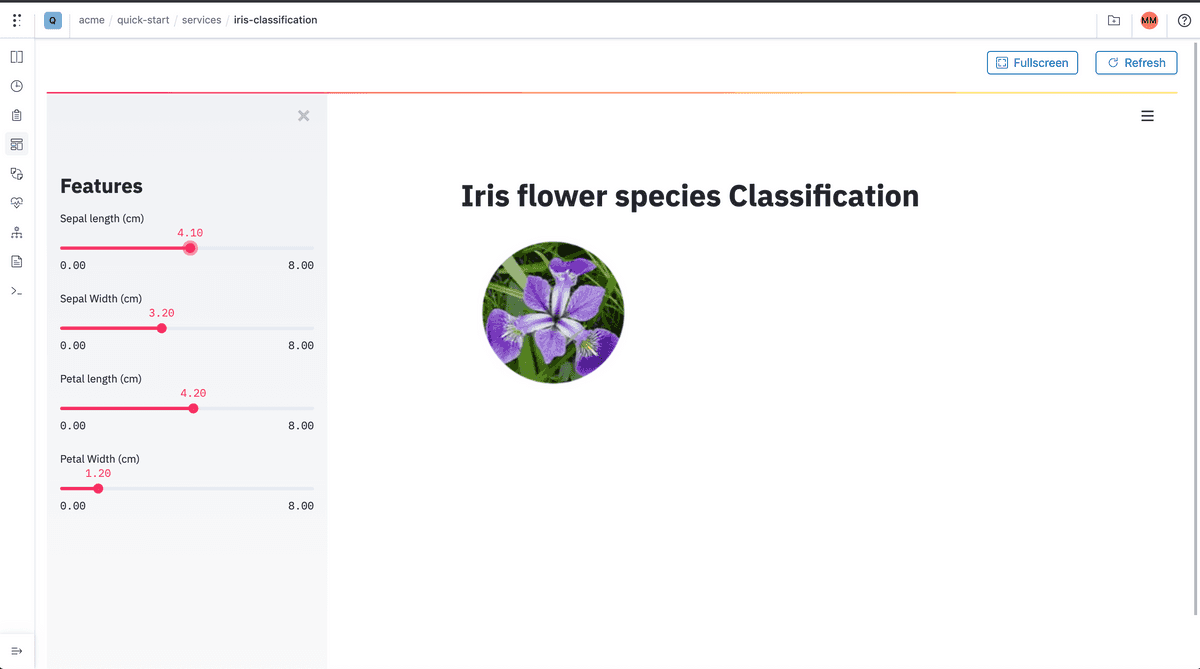
We will deploy a simple streamlit app that will load our model and display an app that makes a prediction based on the features and displays an image corresponding to the flower class.
import streamlit as st
import pandas as pd
import joblib
import argparse

from PIL import Image


def load_model(model_path: str):
    model = open(model_path, "rb")
    return joblib.load(model)


if __name__ == '__main__':
    parser = argparse.ArgumentParser()
    parser.add_argument(
        '--model-path',
        type=str,
    )
    args = parser.parse_args()

    setosa = Image.open("images/iris-setosa.png")
    versicolor = Image.open("images/iris-versicolor.png")
    virginica = Image.open("images/iris-virginica.png")
    classifier = load_model(args.model_path)

    st.title("Iris flower species Classification")
    st.sidebar.title("Features")
    parameter_list = [
        "Sepal length (cm)",
        "Sepal Width (cm)",
        "Petal length (cm)",
        "Petal Width (cm)"
    ]
    sliders = []
    for parameter, parameter_df in zip(parameter_list, ['5.2', '3.2', '4.2', '1.2']):
        values = st.sidebar.slider(
            label=parameter,
            key=parameter,
            value=float(parameter_df),
            min_value=0.0,
            max_value=8.0,
            step=0.1
        )
        sliders.append(values)

    input_variables = pd.DataFrame([sliders], columns=parameter_list)

    prediction = classifier.predict(input_variables)
    if prediction == 0:

    elif prediction == 1:
        st.image(versicolor)
    else:
        st.image(virginica)
Let’s schedule the app with Polyaxon
polyaxon run --url=https://raw.githubusercontent.com/polyaxon/polyaxon-examples/master/in_cluster/sklearn/iris/streamlit-polyaxonfile.yml -P uuid=86ffaea976c647fba813fca9153781ffNote that the uuid
86ffaea976c647fba813fca9153781ffwill be different in your use case.
Conclusion
In this tutorial, we went through an end-to-end process of training and deploying a simple classification app using Kubernetes, Streamlit, and Polyaxon. You can find the source code for this tutorial in this repo.
You can learn more about Polyaxon by visiting our documentation site.
