Overview
In this section, we will learn how to train a machine learning model and deploy it as:
- An interactive dashboard with streamlit.
- An REST API with Flask.
- An REST API with FastAPI.
- A Batch Scoring Job.
In order to create the various serving services and batch scoring jobs, we will need first to create and log a model.
Clone the repo
Clone the ml-serving example repo:
git clone https://github.com/polyaxon/polyaxon-ml-serving.gitThen cd into the new folder:
cd polyaxon-ml-servingCreate a new project
Let’s create a new project ml-serving:
polyaxon project create --name=ml-serving --initThis command will both create a new project on Polyaxon and initialize the local folder so that we can run the command without providing the project name everytime we want to schedule a new operation.
Training a machine learning model
we will train a model to classify Iris flower species from its features.
Iris features: Sepal, Petal, lengths, and widths
Exploring the datasets
We will start first by exploring the iris dataset in a notebook session running on our Kubernetes cluster.
Let’s start a new notebook session and wait until it reaches the running state:
polyaxon run --hub jupyterlab -wLet’s create a new notebook and start by examining the dataset’s features:
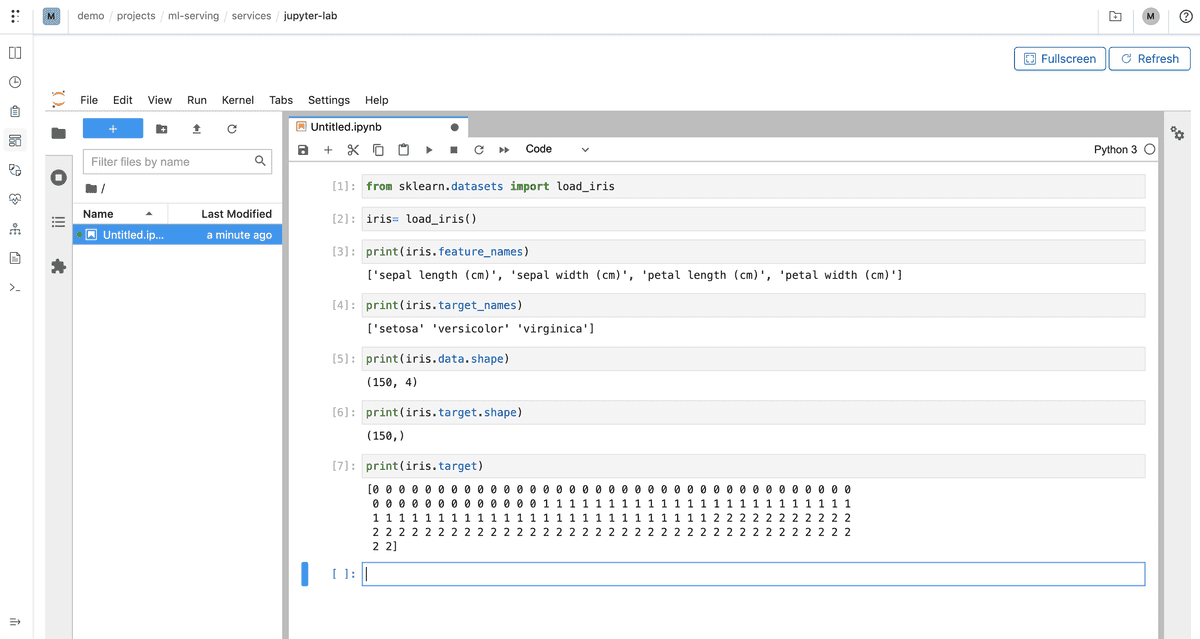
Commands executed:
from sklearn.datasets import load_iris

iris= load_iris()

print(iris.feature_names)
print(iris.target_names)
print(iris.data.shape)
print(iris.target.shape)
print(iris.target)
Exploring the model
There are different classes of algorithms that scikit-learn offers, in the scope of this tutorial, we will use Nearest Neighbors algorithm.
Before we create a robust script, we will play around with a simple model in our notebook session:
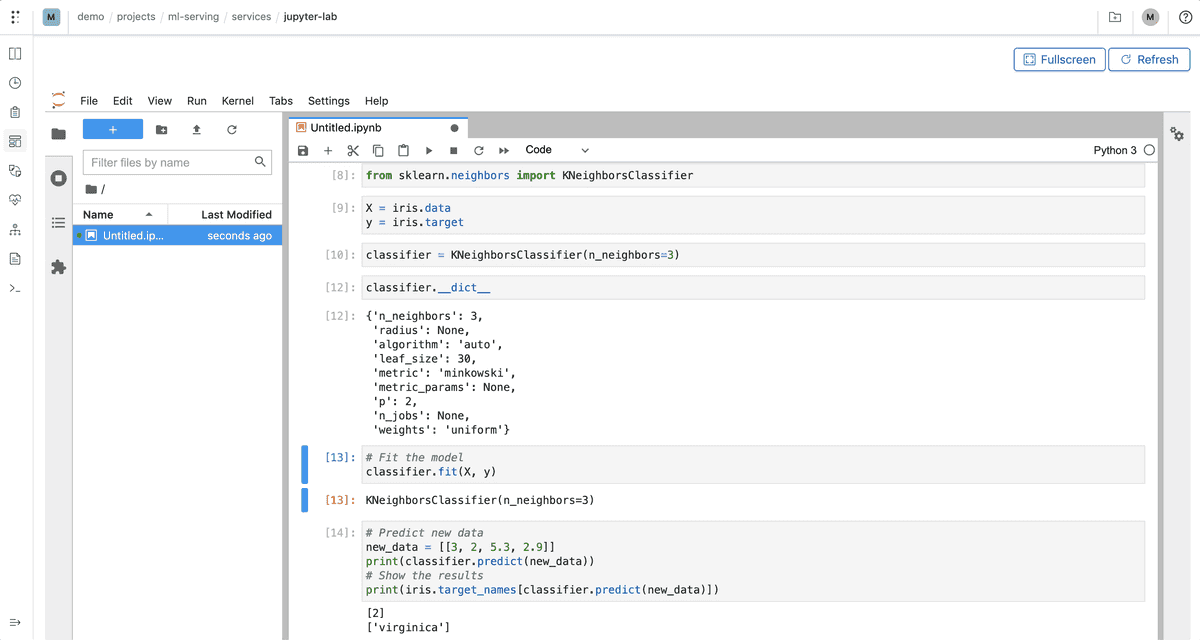
Commands executed:
from sklearn.neighbors import KNeighborsClassifier

X = iris.data
y = iris.target

classifier = KNeighborsClassifier(n_neighbors=3)
# Fit the model
classifier.fit(X, y)

# Predict new data
new_data = [[3, 2, 5.3, 2.9]]
print(classifier.predict(new_data))

# Show the results
print(iris.target_names[classifier.predict(new_data)])
In this case we used n_neighbors=3 and the complete dataset for training the model.
In order to explore different variants of our model, we need to make a script for our model, and parametrize the inputs and outputs, to easily change the parameters such as n_neighbors we also need to establish some rigorous way of estimating the performance of the model.
A practical way of doing that, is by creating an evaluation procedure where we would split the dataset to training and testing. We train the model on the training set and evaluate it on the testing set.
scikit-learn provides methods to split a dataset:
from sklearn.model_selection import train_test_split

X_train, X_test, y_train, y_test = train_test_split(X, y, test_size=0.3, random_state=1012)
Productionizing the model training
Now that we established some practices let’s create a function that accepts parameters, trains the model, and saves the resulting score:
import joblib

from sklearn.model_selection import train_test_split
from sklearn.neighbors import KNeighborsClassifier
from sklearn import metrics
from sklearn.datasets import load_iris


def train_and_eval(
    n_neighbors=3,
    leaf_size=30,
    metric='minkowski',
    p=2,
    weights='uniform',
    test_size=0.3,
    random_state=1012,
    model_path=None,
):
    iris = load_iris()
    X = iris.data
    y = iris.target
    X_train, X_test, y_train, y_test = train_test_split(X, y, test_size=test_size, random_state=random_state)
    classifier = KNeighborsClassifier(n_neighbors=n_neighbors, leaf_size=leaf_size, metric=metric, p=p, weights=weights)
    classifier.fit(X_train, y_train)
    y_pred = classifier.predict(X_test)
    accuracy = metrics.accuracy_score(y_test, y_pred)
    recall = metrics.recall_score(y_test, y_pred, average='weighted')
    f1 = metrics.f1_score(y_pred, y_pred, average='weighted')
    results = {
        'accuracy': accuracy,
        'recall': recall,
        'f1': f1,
    }
    if model_path:
        joblib.dump(classifier, model_path)
    return results
Now we have a script that accepts parameters to evaluate the model based on different inputs, saves the model and returns the results, but this is still very manual, and for larger and more complex models this is very impractical.
Running experiments with Polyaxon
Instead of running the model by manually changing the values in the notebook, we will create a script and run the model using Polyaxon. We will also log the resulting metrics and model using Polyaxon’s tracking module. The code for the model that we will train can be found in this github repo.
Running the example with the default parameters:
polyaxon run -f train/polyaxonfile.yaml -lYou will notice that we did not set the -f argument of the run command, the reason why is that polyaxon run command by default will look for any file called polyaxonfil.y*ml and will execute it.
Running with a different parameters:
polyaxon run -f train/polyaxonfile.yaml -l -P n_neighbors=50Scheduling multiple parallel experiments
Instead of manually changing the parameters, we will automate this process by exploring a space of configurations:
polyaxon run -f train/hyper-polyaxonfile.yamlThis will create several experiments that will run in parallel:
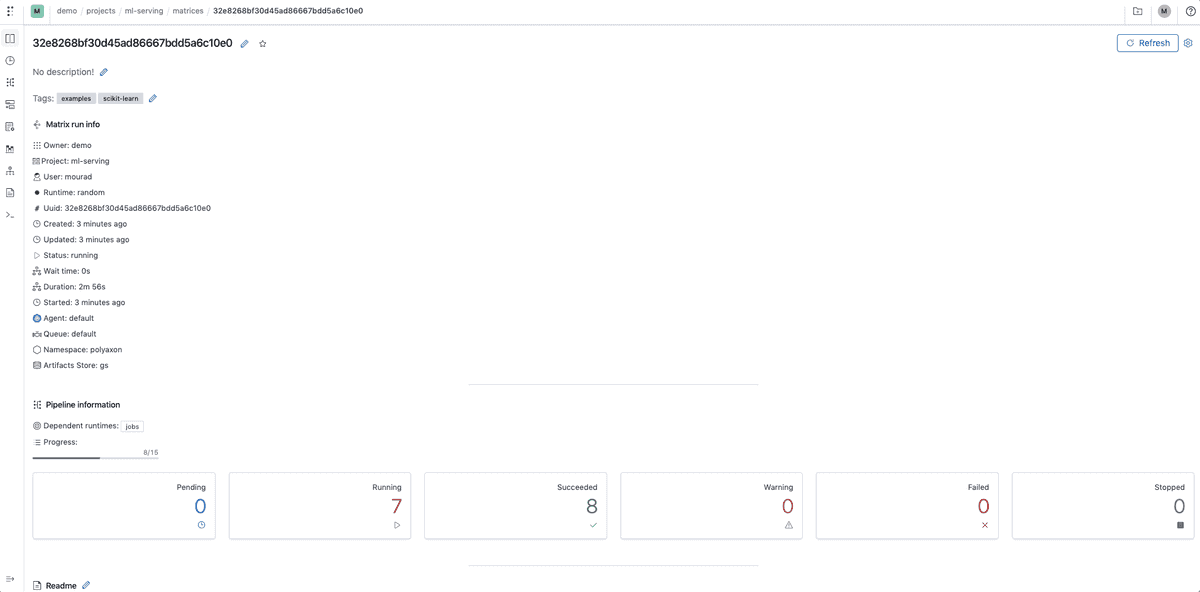
Analyzing the experiments
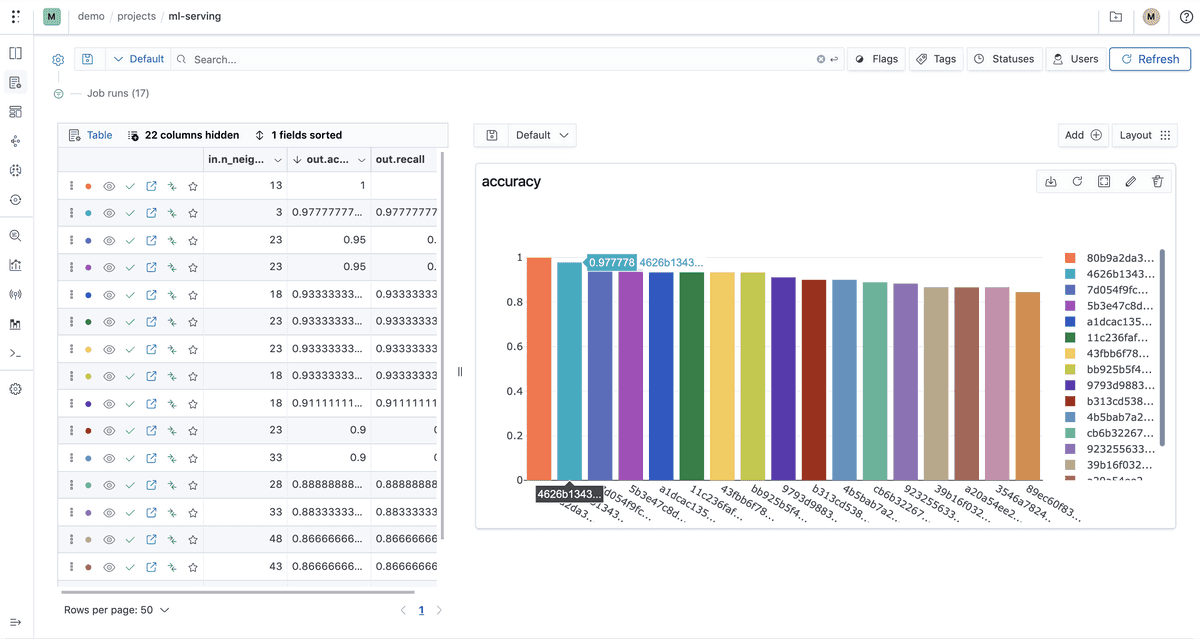
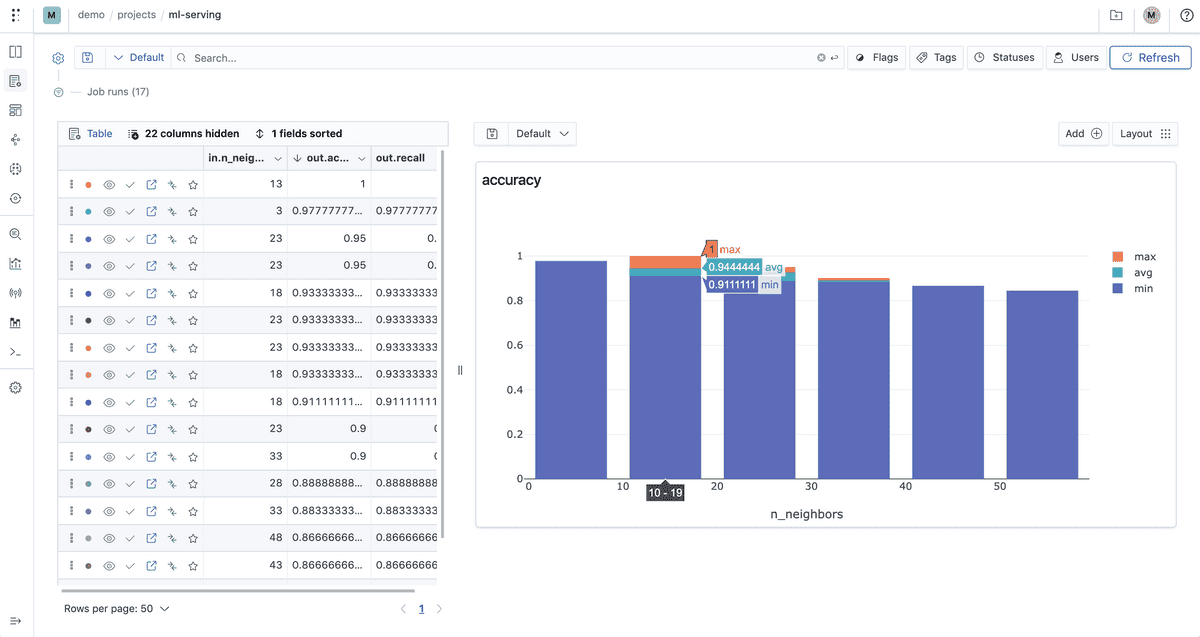
Sorting the experiments based on their accuracy metric
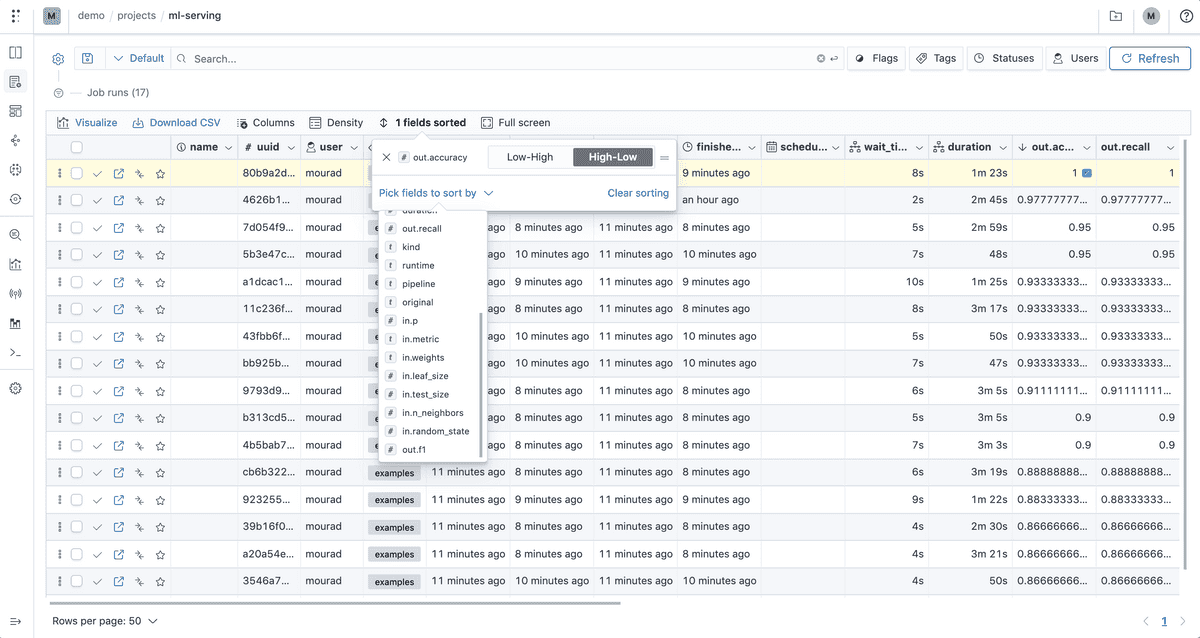
Experiments accuracy
Comparing accuracy against n_neighbors
Selecting and deploying the best model by accuracy
In our training script we used Polyaxon to log a model every time we run an experiment:
# Logging the model
tracking.log_model(model_path, name="iris-model", framework="scikit-learn", versioned=False)Note: the
versionedwas removed in version>v1.17and is the default behavior.
In the following guides, we will deploy:
- A simple streamlit app that loads the model and displays an app that makes a prediction based on the features and displays an image corresponding to the flower class.
- A REST API using Flask that loads the model, expects data, and returns predictions.
- A REST API using FastAPI that loads the model, expects data, and returns predictions.
- A scoring batch job that loads the model, expects data, and make predictions.