Overview
In the previous guide we trained several models. In this section we will learn how to deploy a serving REST API with Flask. This is an example of creating a REST API that you can host using Polyaxon, this type of APIs are intended for internal use or for testing purposes before moving to a platform that specializes in serving or inference.
The same principles in this guides can be used to deploy similar REST APIs using any other framework of your choice.
All code and manifests used in this tutorial can be found in this github repo.
Note: On Polyaxon EE or Polyaxon Cloud, the REST APIs will be protected and can only be accessed by users who have access to your organization following the permissions defined for each member.
Logged model
In our training script we used Polyaxon to log a model every time we run an experiment:
# Logging the model
tracking.log_model(model_path, name="iris-model", framework="scikit-learn", versioned=False)Note: the
versionedwas removed in version>v1.17and is the default behavior.
Deploying a serving REST API
We will deploy a simple Flask service that will load the best model based on accuracy as an Iris classification RESt API. Our service will expose two API endpoints, one for returning predictions and one for returning probabilities.
from typing import Dict

import joblib
import numpy as np
from flask import Flask, jsonify, make_response, request


IRIS_CLASS_MAPPING = {0: 'setosa', 1: 'versicolor', 2: 'virginica'}


def load_model(model_path: str):
    model = open(model_path, "rb")
    return joblib.load(model)


app = Flask(__name__)
classifier = load_model('./model.joblib')


def get_features(
    request_data: Dict[str, float]
) -> np.ndarray:
    return np.array(
        [
            request_data['sepal_length'],
            request_data['sepal_width'],
            request_data['petal_length'],
            request_data['petal_width'],
        ],
        ndmin=2
    )


def predict(features: np.ndarray, proba: bool = False) -> Dict:
    if proba:
        probabilities = {
            k: float(v)
            for k, v in zip(IRIS_CLASS_MAPPING.values(), classifier.predict_proba(features)[0])
        }
        return {"probabilities": probabilities}

    prediction = int(classifier.predict(features)[0])
    return {"prediction": {"value": prediction, "class": IRIS_CLASS_MAPPING[prediction]}}


@app.route('/api/v1/predict', methods=['POST'])
def get_prediction():
    request_data = request.json
    features = get_features(request_data)
    return make_response(jsonify(predict(features)))


@app.route('/api/v1/proba', methods=['POST'])
def get_probabilities():
    request_data = request.json
    features = get_features(request_data)
    return make_response(jsonify(predict(features, proba=True)))


@app.route('/', methods=['GET'])
def index():
    return (
        '<p>Hello, This is a REST API used for Polyaxon ML Serving examples!</p>'
        '<p>Click the fullscreen button the get the URL of your serving API!<p/>'
    )


if __name__ == '__main__':
    app.run(host='0.0.0.0', port=5000)
The custom component has a single input, it expects a run uuid, it then loads the model and copy it under the path polyaxon-ml-serving/flask-serving/model.joblib.
version: 1.1
kind: component
name: flask-iris-classification
tags: ["flask", "api"]

inputs:
- name: uuid
  type: str

run:
  kind: service
  ports: [5000]
  rewritePath: true
  init:
  - git: {"url": "https://github.com/polyaxon/polyaxon-ml-serving"}
  - artifacts: {"files": [["{{ uuid }}/outputs/model/model.joblib", "{{ globals.artifacts_path }}/polyaxon-ml-serving/flask-serving/model.joblib"]]}
  container:
    image: polyaxon/polyaxon-examples:ml-serving
    workingDir: "{{ globals.artifacts_path }}/polyaxon-ml-serving/flask-serving"
    command: [python, app.py]
Scheduling the service
To schedule this REST API with Polyaxon:
polyaxon run -f flask-serving/polyaxonfile.yaml -P uuid=f8176c9463a345908ce6865c9c7894a9Note that the uuid
f8176c9463a345908ce6865c9c7894a9will be different in your use case.
You can now interact with the service using Python or curl. You can get the serving endpoint using the CLI:
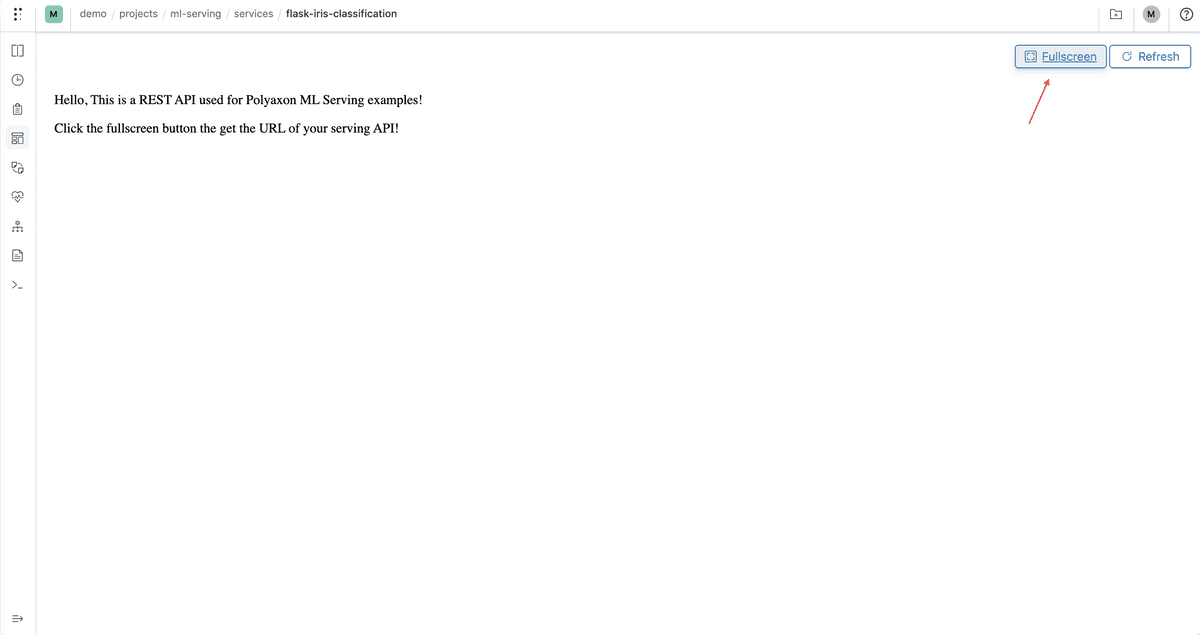
polyaxon ops service --external --urlYou can also retrieve the URL by going to the service tab and click fullscreen:

Testing the Service
Testing the predictions endpoint:
curl HOST:PORT/rewrite-services/v1/NAMESPACE/ORG/PROJECT/runs/UUID/api/v1/predict --request POST \
    --header "Content-Type: application/json" \
    --data '{"sepal_length": 2, "sepal_width": 2.5, "petal_length": 2, "petal_width": 0.5}'

{"prediction":{"class":"setosa","value":0}}
Testing the probabilities endpoint:
curl HOST:PORT/rewrite-services/v1/NAMESPACE/ORG/PROJECT/runs/UUID/api/v1/proba \
    --request POST \
    --header "Content-Type: application/json" \
    --data '{"sepal_length": 5.1, "sepal_width": 3.5, "petal_length": 1.4, "petal_width": 0.2}'

{"prediction":{"class":"setosa","value":0}}
Please note that if you are using Polyaxon Cloud or Polyaxon EE you will need to add a header with a valid auth token:
--header "Authorization: token API_TOKEN"Serving a more robust service
The previous component runs the default dev server, you can also expose the app using a production wsgi server using this gunicorn component manifest:
version: 1.1
kind: component
name: flask-iris-classification
tags: ["flask", "api"]

inputs:
- name: uuid
  type: str

run:
  kind: service
  ports: [8000]
  rewritePath: true
  init:
  - git: {"url": "https://github.com/polyaxon/polyaxon-ml-serving"}
  - artifacts: {"files": [["{{ uuid }}/outputs/model/model.joblib", "{{ globals.artifacts_path }}/polyaxon-ml-serving/flask-serving/model.joblib"]]}
  container:
    image: polyaxon/polyaxon-examples:ml-serving
    workingDir: "{{ globals.artifacts_path }}/polyaxon-ml-serving/flask-serving"
    args: ["gunicorn --preload -t 60 --bind 0.0.0.0:8000 app:server"]
To schedule this REST API with Polyaxon:
polyaxon run -f flask-serving/polyaxonfile-gunicorn.yaml -P uuid=f8176c9463a345908ce6865c9c7894a9Saving the custom REST API in the component hub
By adding more parameters to this Rest API, users can save this component to their private hub and allow users to easily schedule the custom API using the CLI/UI.